

How To Tilt Pictures In Photoshop
Use Tilt-Shift in Photoshop
Tilt-shift photography is a special way of selectively focusing and defocusing parts of an epitome by manually tilting and shifting the position of a camera lens relative to the prototype capture area.
Today, the term is better known equally a method of making regular photographs wait like photos of miniature model villages and cities. The effect is accomplished by simulating an exaggerated depth-of-field (the centre of the image is normally in focus, and anything nearer or further abroad is blurred) to resemble how a camera would capture a small, close-upwards scene at an angle.
Tilt shift in Photoshop began with CS6, which introduced a brilliantly elementary Tilt-shift Blur issue which, when combined with a saturation boost, is perfect for simulating miniature model photography. In this tutorial I'll testify you how to add together this outcome to your piece of work.
Step 01
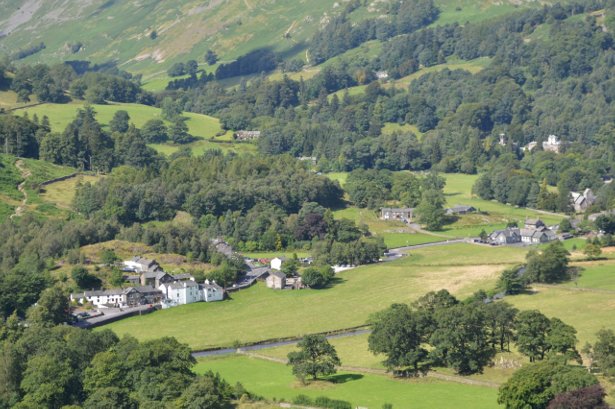
First upwards, load your paradigm into Photoshop and create a duplicate. The classic perspective for tilt-shift photography tends to exist a shot taken from fairly high upward – perhaps from an function window or the side of a colina – with a medium focal length so the perspective isn't too enhanced, and with some small, interesting details around the centre. However, the effect can exist used much more creatively.
Step 02
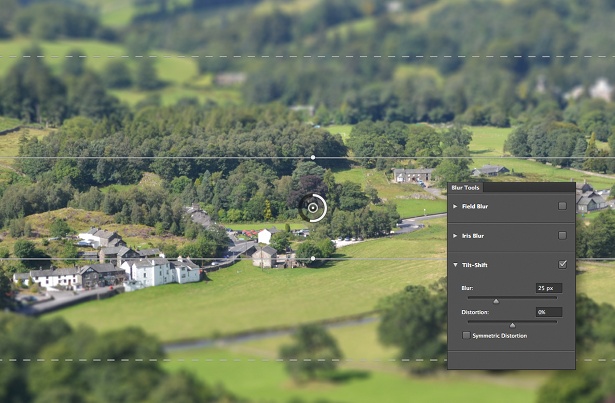
You can find CS6'due south Tilt-shift filter in the Mistiness category of the Filters card. Y'all're immediately presented with a circle in the center, which represents the focal bespeak. The confined either side represent a horizontal strip that volition determine what part of the image stays in focus. As we get to the dotted lines, the mistiness effect fades in, and beyond that we take total blur. Plow the blur radius upwards to 25px.
Pace 03
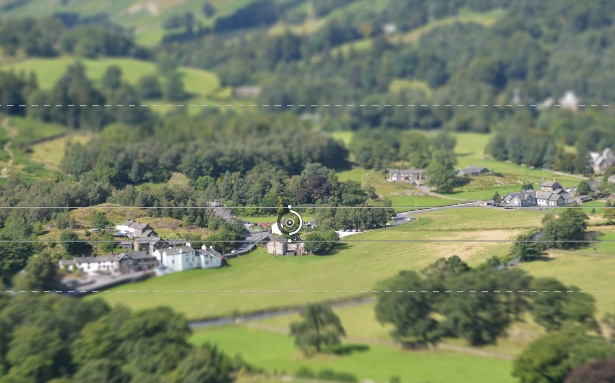
These bars can be adjusted to command how the blurring is applied. Nosotros're exaggerating depth-of-field, so use the landscape as a guide. I've created a narrow, in-focus strip running through the hamlet. Then, because we've got a close foreground, I've brought the lower dotted line up so that the blur comes in quickly at the bottom of the image. The Distortion control gives the blurring a zoomed perspective effect – I've used 80%.
Step 04
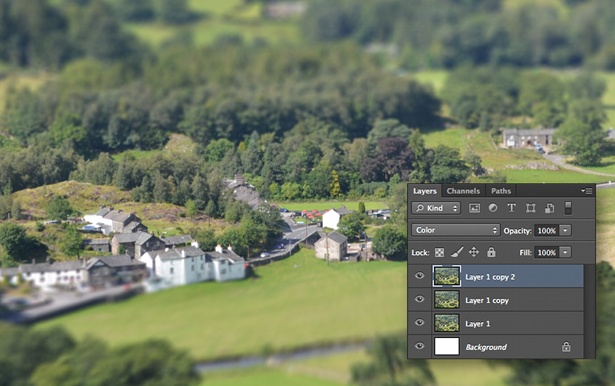
The defocused effect is only i one-half of the wait we're creating here. The other half is giving our image a vibrant, colourful wait, and for this I'm using my ain saturation pull a fast one on, rather than the usual Hue/Saturation or Vibrance adjustment layers. Create a copy of your tilt-shifted image with Cmd/Ctrl+J, and set this new layer's blending mode to Colour.
Step 05
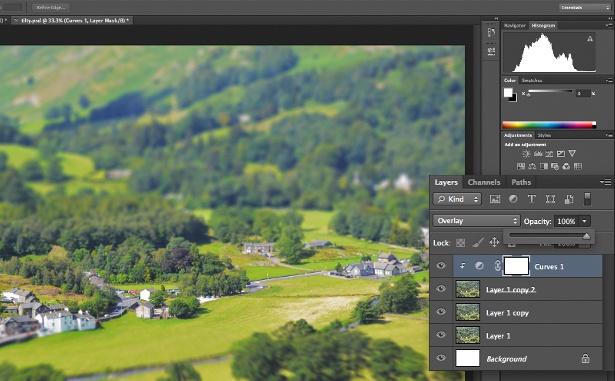
Now add a Curves adjustment layer (we could actually use almost whatever adjustment layer here) and adhere information technology to the top layer as a clipping mask. Nosotros can exercise this either by selecting Create Clipping Mask, in the Layers carte du jour, or by Opt/Alt+clicking between the two layers in the Layers panel. Now set the Curves layer'due south blending mode to Overlay, and control the saturation strength with the Opacity slider.
Liked this? Read these!
- Free Photoshop brushes (opens in new tab)
- Free Photoshop actions (opens in new tab) to create stunning furnishings
- The best Photoshop plugins (opens in new tab)
- Download free textures: high resolution and set up to use now

Thank you for reading 5 manufactures this month* Join now for unlimited access
Enjoy your first calendar month for simply £i / $ane / €1
*Read v free articles per month without a subscription
Bring together now for unlimited access
Try first month for only £1 / $ane / €one
Related manufactures
Source: https://www.creativebloq.com/adobe/tilt-shift-photoshop-6122721
Posted by: baronmoreary.blogspot.com
0 Response to "How To Tilt Pictures In Photoshop"
Post a Comment