

How To Make Someone Look Tan In Photoshop
How To Make Yourself Wait Tan In Lightroom
If you lot're like me and suffer from perpetually pale pare, luckily, yous tin give yourself a tan with the help of Lightroom. Even if it's the dead of wintertime and you oasis't seen the lord's day in a calendar month, yous can brand it look like your skin has a nice summer's glow. With the assist of a few hue sliders, y'all can quickly change your skin tone to create a fake tan. As an alternate option, you can as well employ selective masks to better isolate the tan event. In this tutorial, you lot'll learn both of these methods so you can make any photo look like you merely got dorsum from the embankment.
To make your skin look tan in Lightroom, get to the HSL panel and decrease the orange and yellow hue value. Next, increase the saturation of the orangish and yellow hue sliders to enhance the tan colour. To finalize the effect, adjust the orange Luminance value to make the tan await lighter or darker.
To first things off, let's walk through the most elementary way of creating a tan in Lightroom. This first method will use the HSL panel to shift the peel hues to favor a brown look.
Method 1: Creating Tan Skin With The HSL Adjustment In Lightroom
Rather than dealing with masks, this option uses the HSL sliders to go the job washed. The advantage of this method is that it's quick and only takes a few seconds. The downside is that you may end up altering other colors in your photograph. Especially if you already have other warmer tones in the image, this won't offer the all-time results. So if that sounds like the blazon of image yous're working with, skip ahead to technique number two!
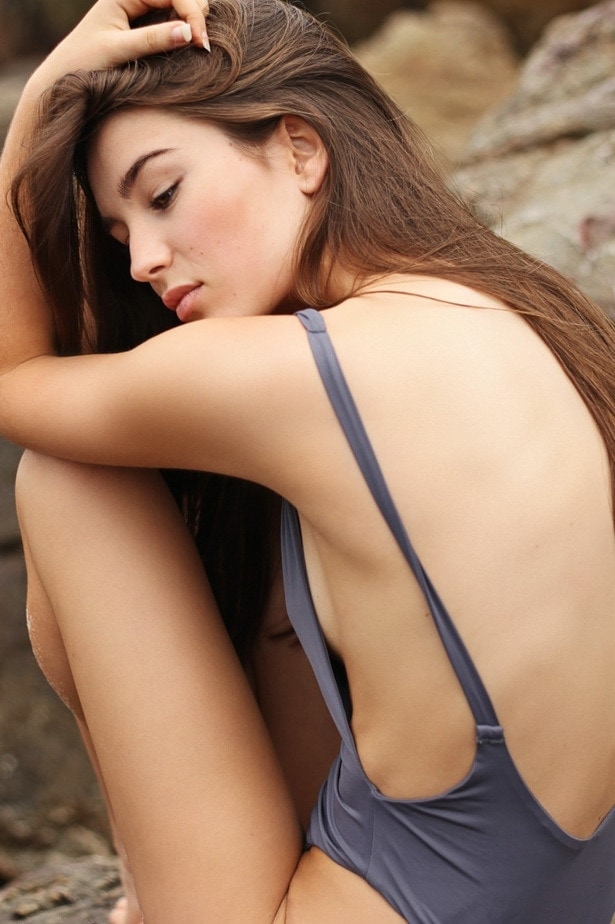
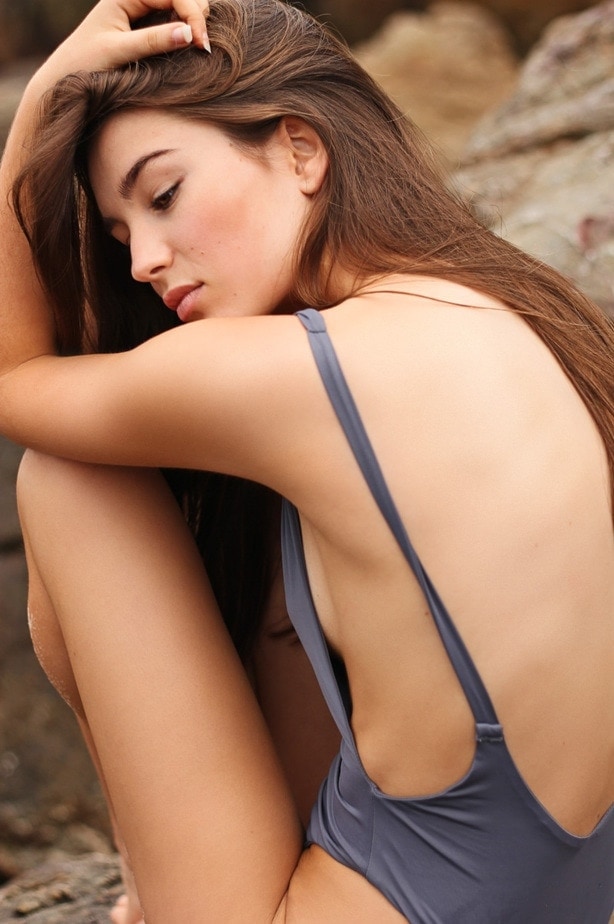
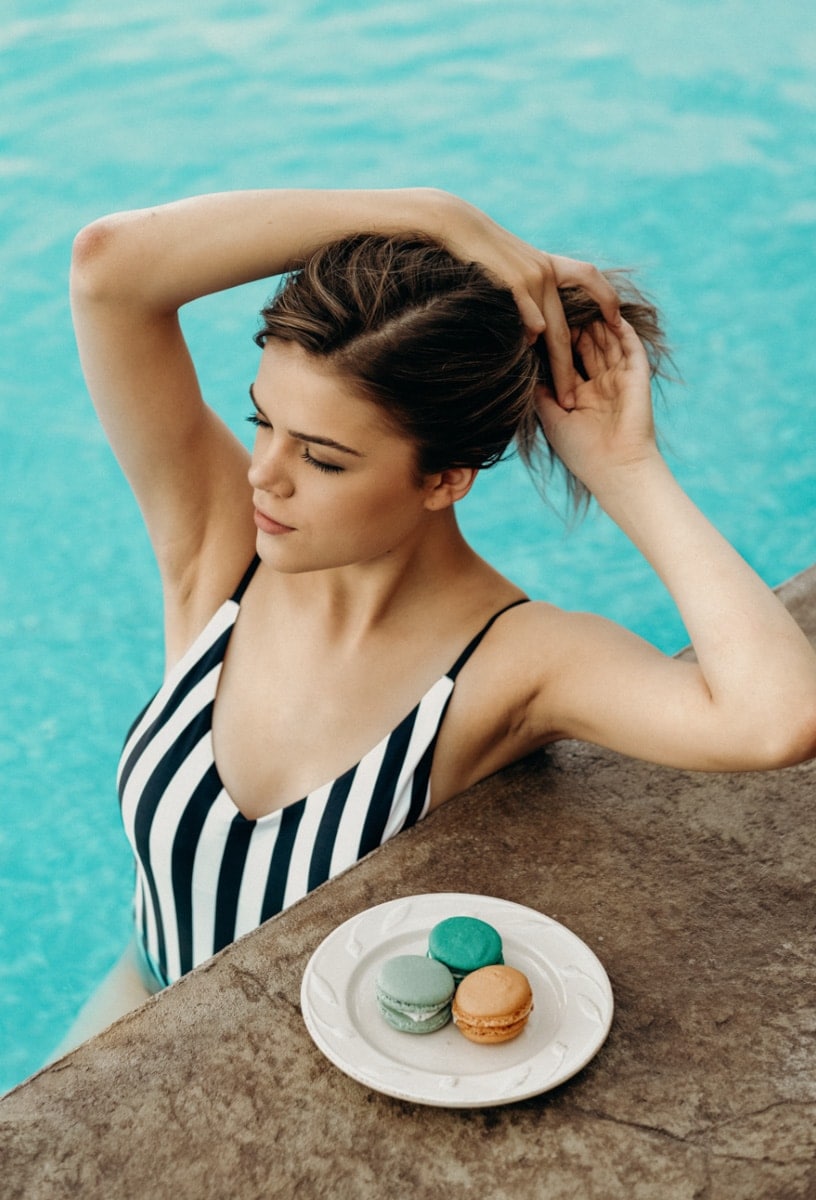
The Starting Prototype.
Step ane: Subtract The Orange & Yellow Hue Value
Going downwards to the HSL Panel inside the Develop Module of Lightroom, select the Hue adjustment.
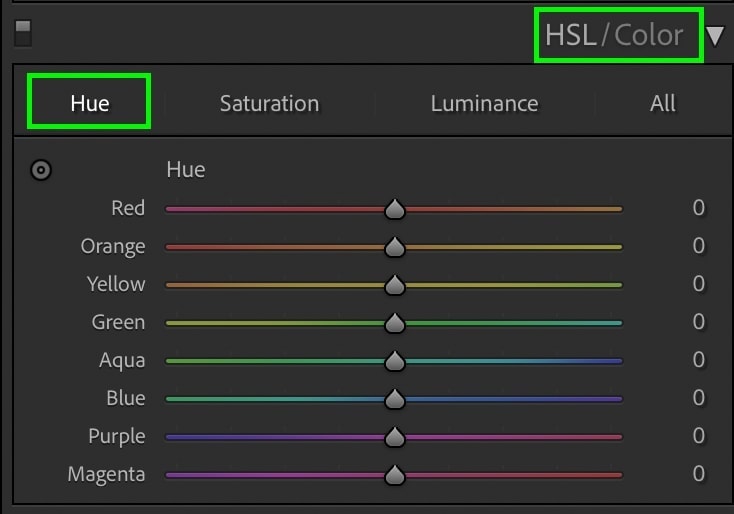
Since skin tones typically autumn into the yellow or orange hues, these are the sliders y'all'll desire to work with. To favor a tan skin tone, you need to make these two hues more ruby-red. When applied subtlety, they create a brown appearance rather than the look of a burnt lobster.
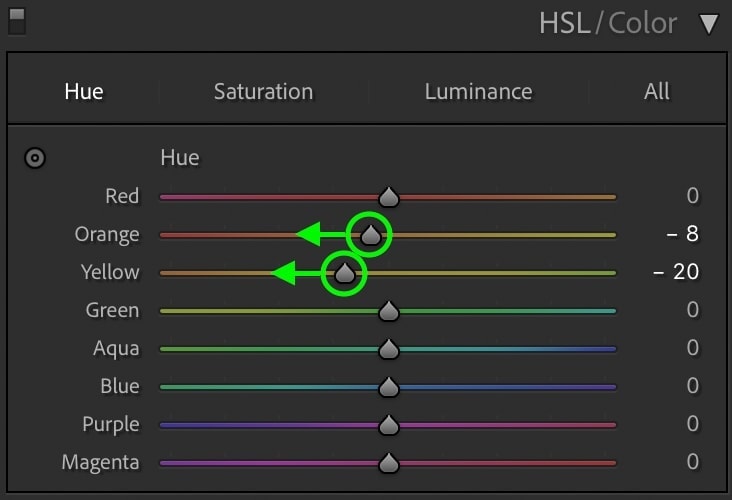
Moving each of these sliders to the left, you lot'll alter the pare tone and begin to favor this more tan hue. In some cases, the red color hue may work well too if you have a lot of regal tones in your paradigm.
Now you're left with a slightly warmer peel tone and yous have the base adjustments for the tan.
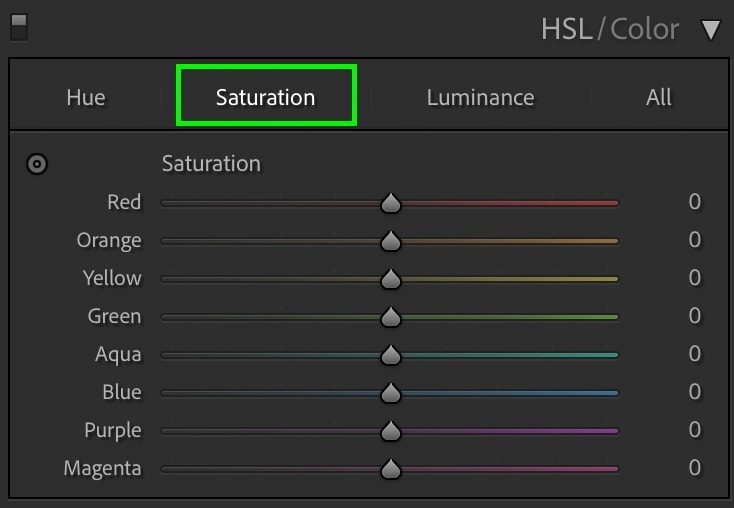
Step 2: Increase The Orange & Yellow Saturation Value
Next upwardly, click on the Saturation adjustment in the HSL panel. Rather than changing the color hue, this setting will modify the richness of the pare tones. In layman's terms, that means you're about to go your tan on!
Like with the hue adjustment, you'll want to focus on the orange and yellowish sliders. Increase each of these sliders by moving them to the right until yous're happy with the effects.
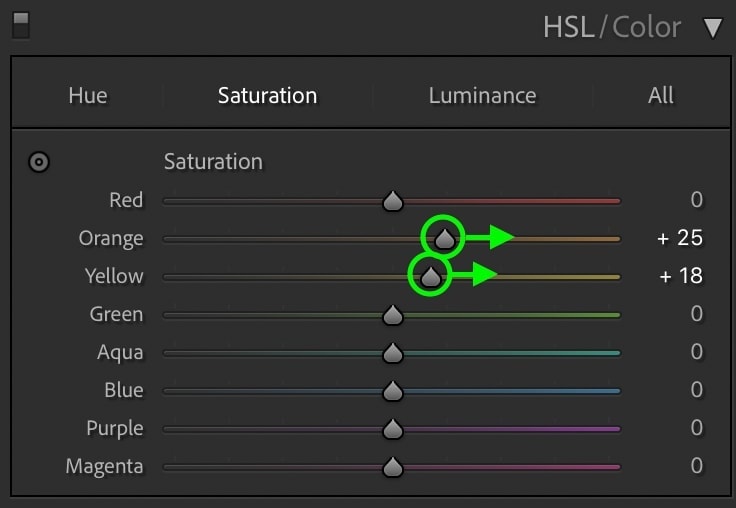
If yous go too overboard with this, the tan event won't look realistic anymore. Subtlety is key!
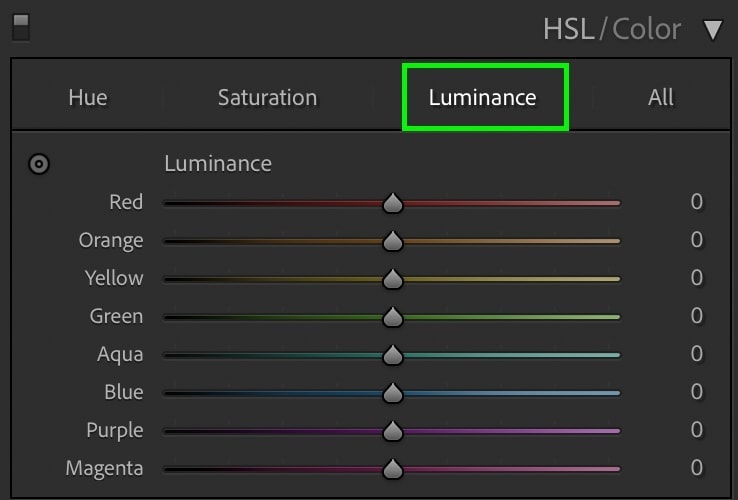
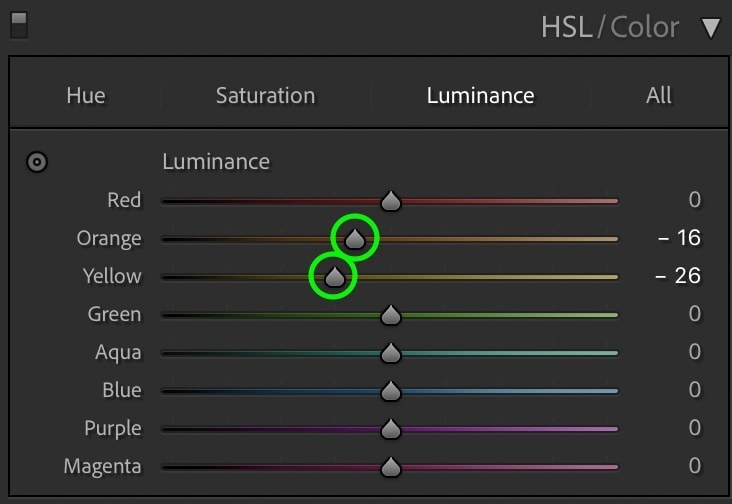
Footstep 3: Refine Your Tan Using The Orange Hue Luminance Slider
At this point, your skin is starting to look a lot more than tan, but permit's brand information technology look even meliorate. Clicking on the Luminance adjustment, play around with the orangish and yellow sliders to meet what effects they offering.
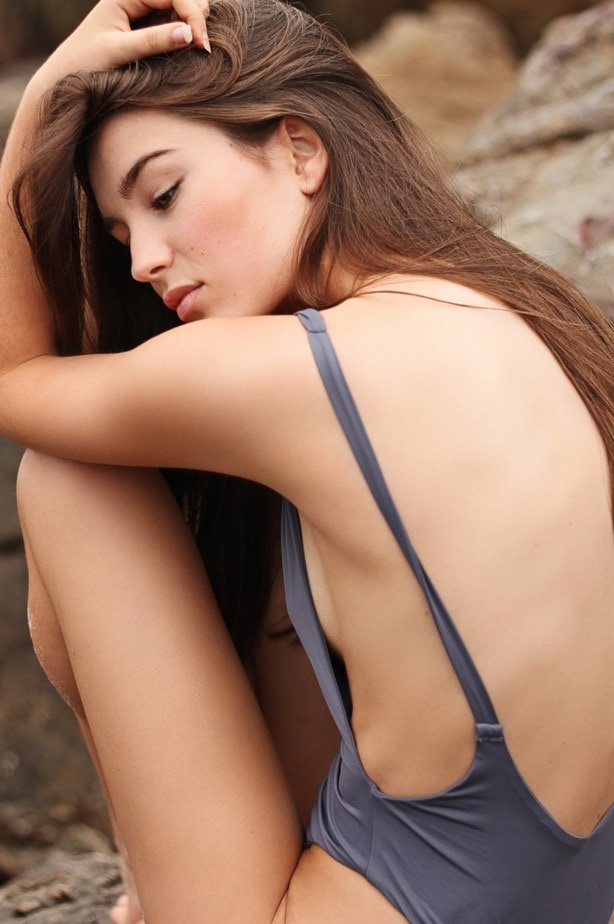
Now after changing the hue, saturation, and luminance values of the pare tones, you're left with a golden tan expect in no fourth dimension.
Pace 4: Increase The Photos White Residual (Optional)
To take things 1 pace further, you can help meliorate the overall tan by changing the white balance of your photo. Scrolling up to the Basic Console, motion the Temp slider to the right to warm upwards the image.
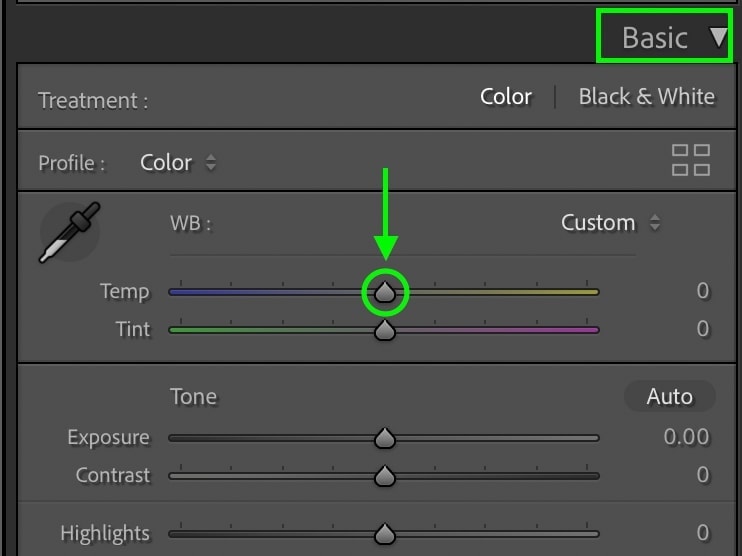
By calculation more yellowish hues to the photo, the skin tone will go fifty-fifty more than tan-looking than before. If you're fine with a warmer white balance for your whole photograph, and so this offers a great optional option to complete this effect.

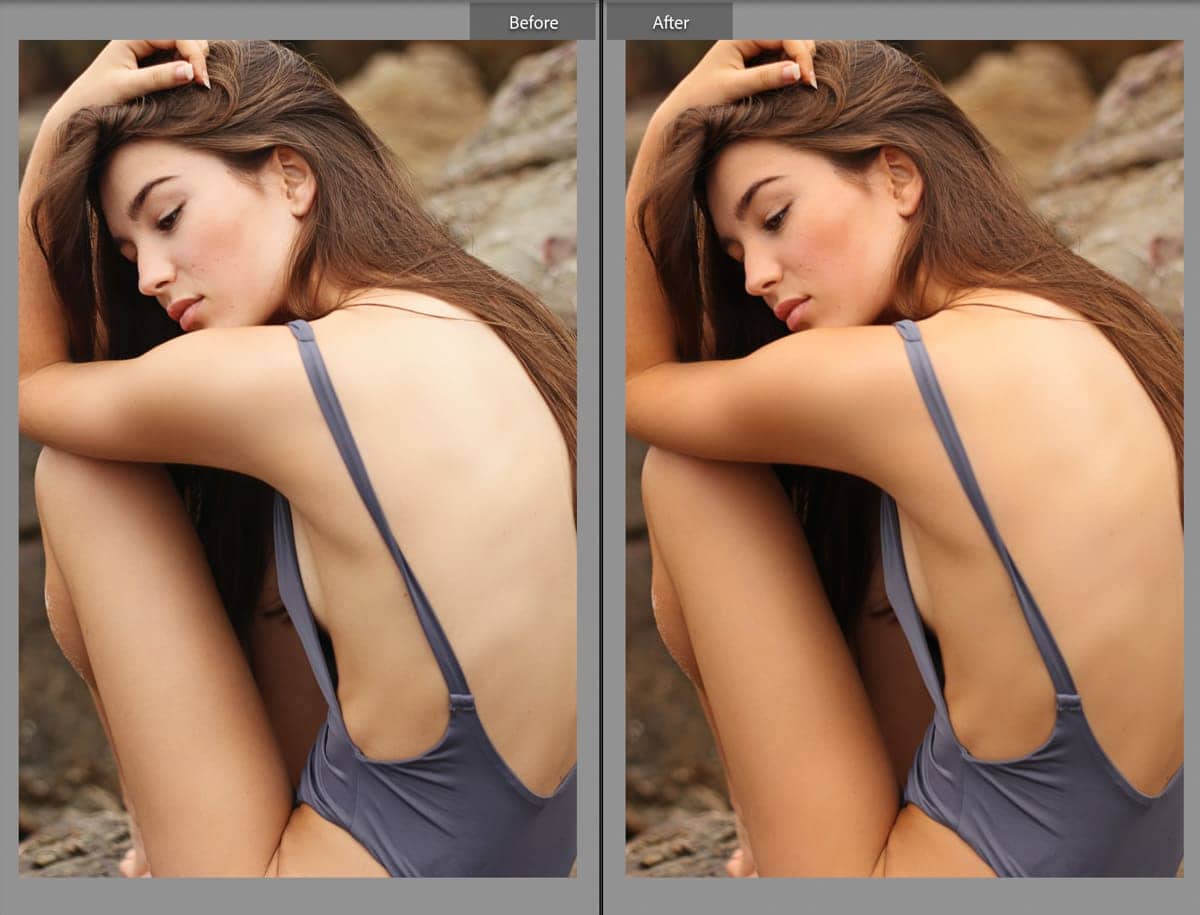
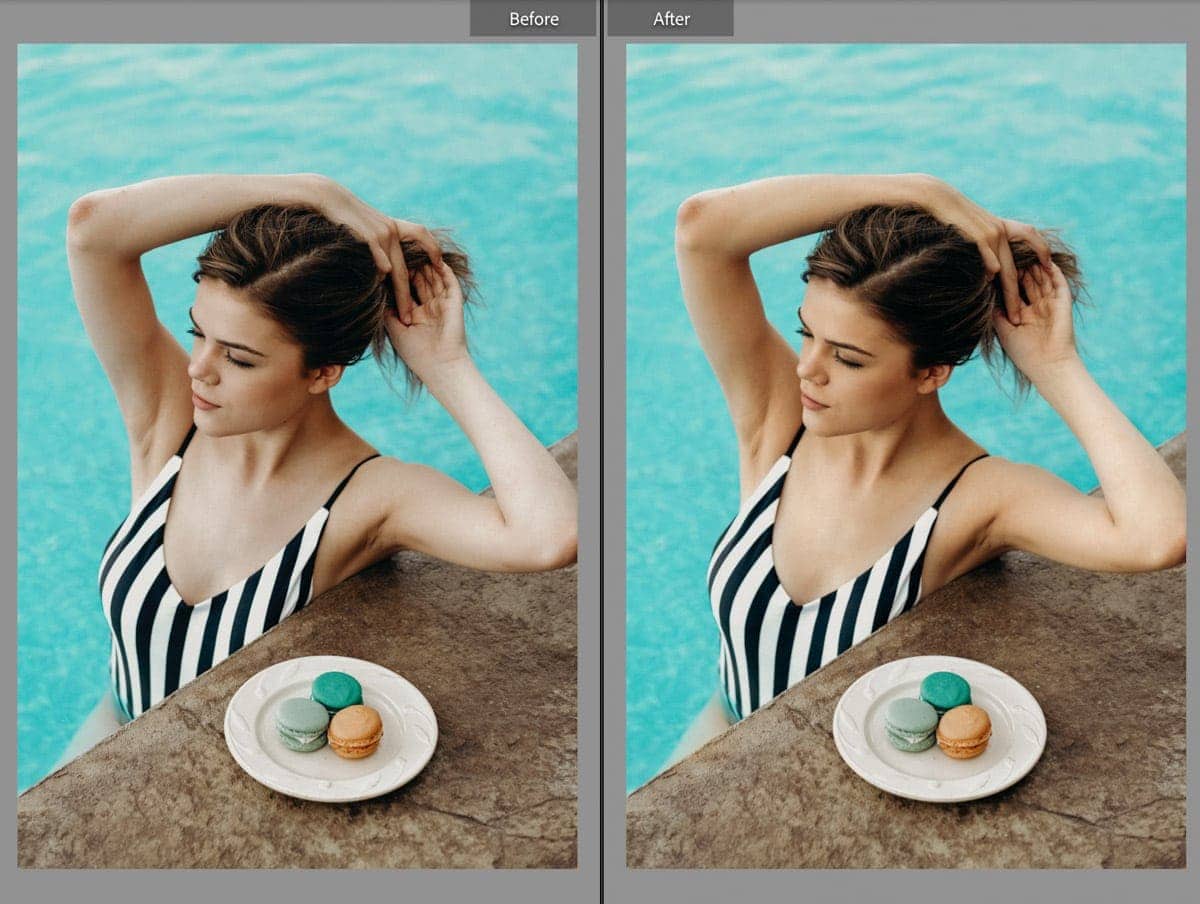
The Result

Method 2: Using Color Range Masks To Create A Tan In Lightroom
This 2d option works best if y'all want to isolate the furnishings to your skin, and none of the groundwork. With the help of an Adjustment Brush mask, you can tell Lightroom exactly where to utilise the effects. This method is my favorite way of making skin wait tan in Lightroom, only it does take a little more effort. Here's how to practise it.

The starting prototype.
Step 1: Create An Adjustment Brush Mask Over The Peel
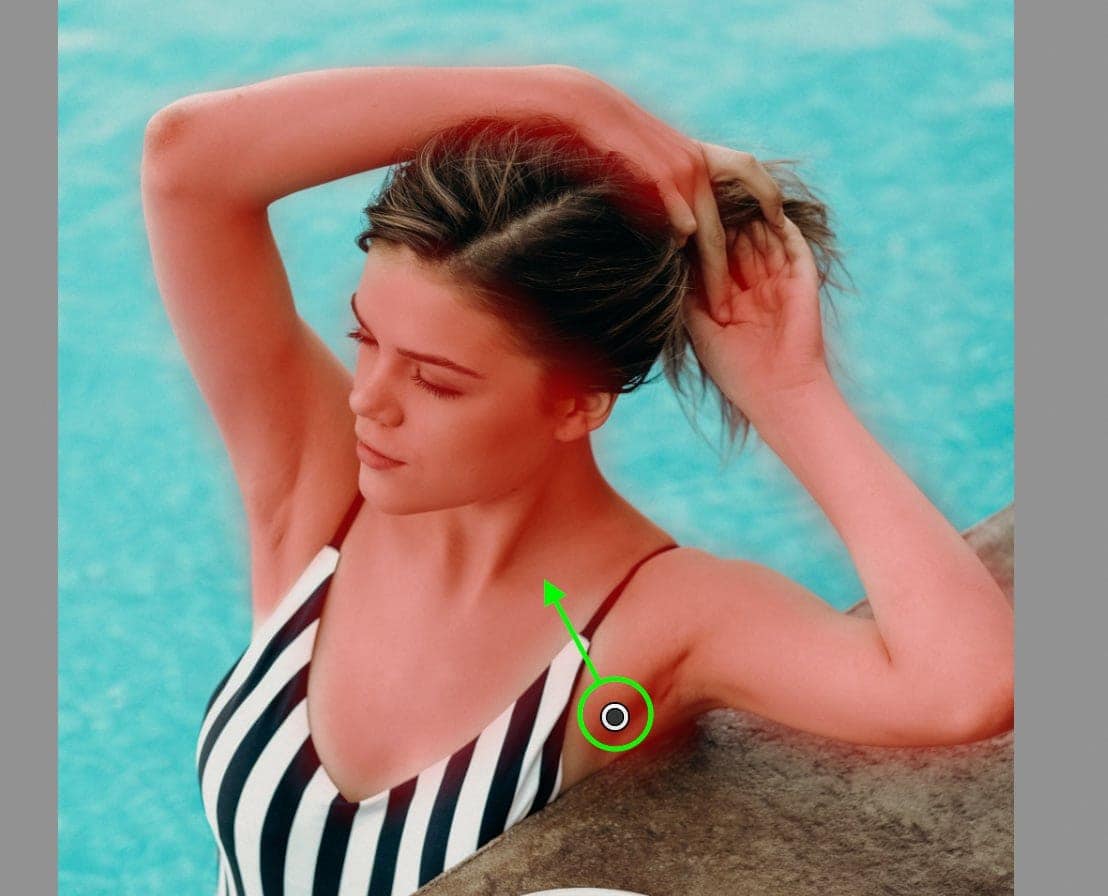
Kickoff past selecting the Adjustment Brush and paint over your subject field's skin.
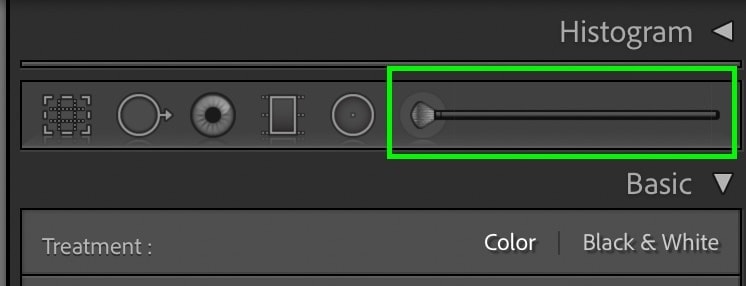
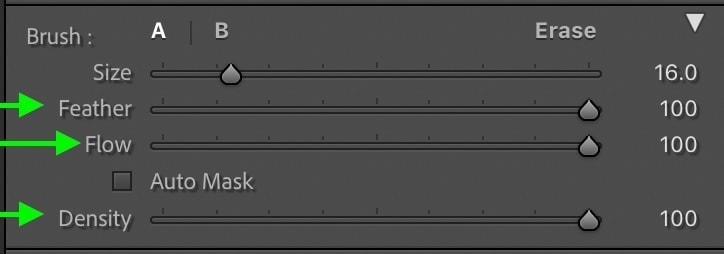
For this example, I'll set the castor feather, flow, and density to 100%. Yous tin can find these settings at the bottom of the spot adjustment window.
Painting over the skin you want to tan, you tin press O on your keyboard to view your mask. Anything with a red highlight will be included in the following adjustments. By actually seeing where yous're masking, you can ensure you don't miss anything.
Stride ii: Add A Color Range Mask To Refine The Adjustment Brush
After creating your initial mask with the adjustment brush, it'southward probable that there is a lot of spill over the edges of your bailiwick. Luckily you tin can fix this upwards with a Colour Range Mask.
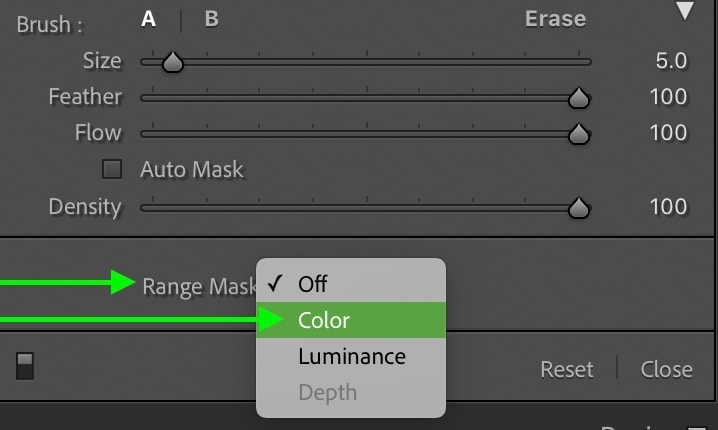
Beneath the adjustment brush settings, click on the Range Mask option and prepare information technology to Color.
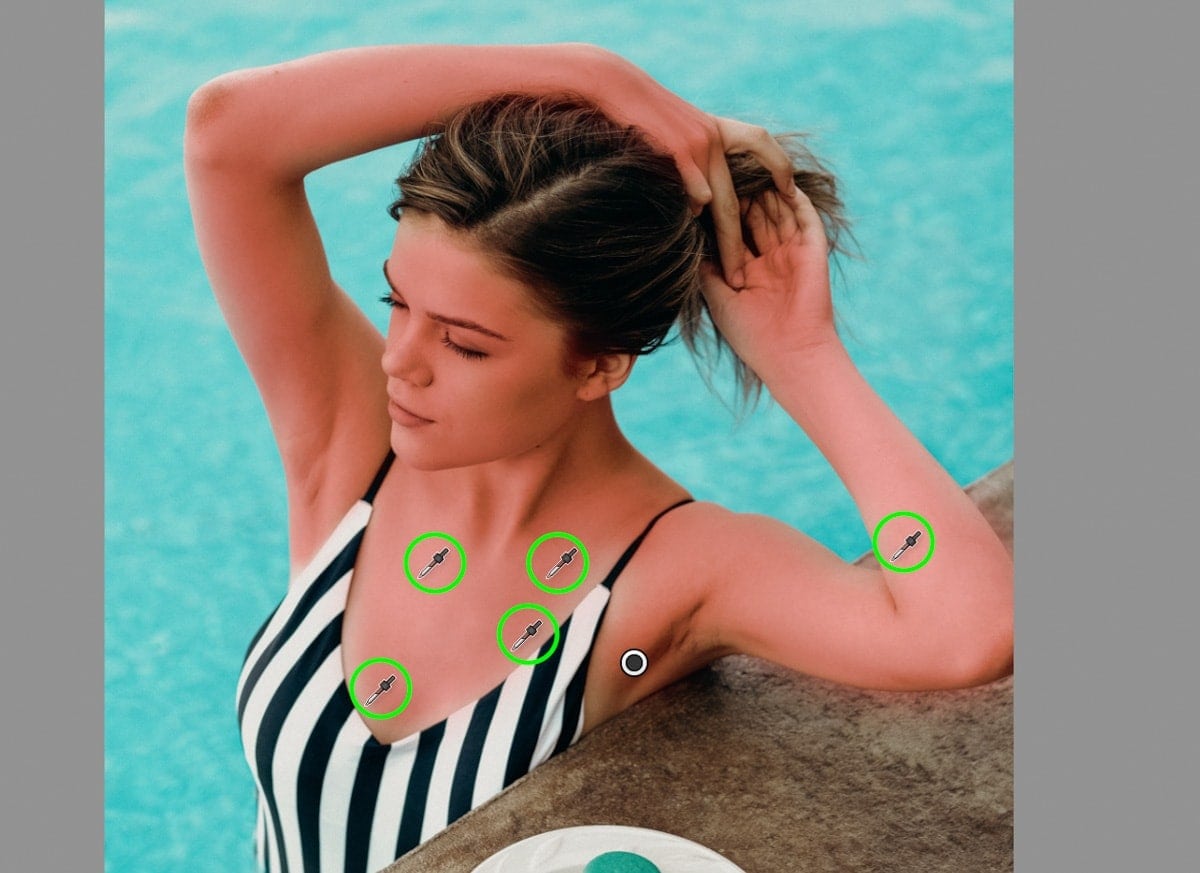
At present click on the eyedropper tool that appears and sample a peel tone in your photo.
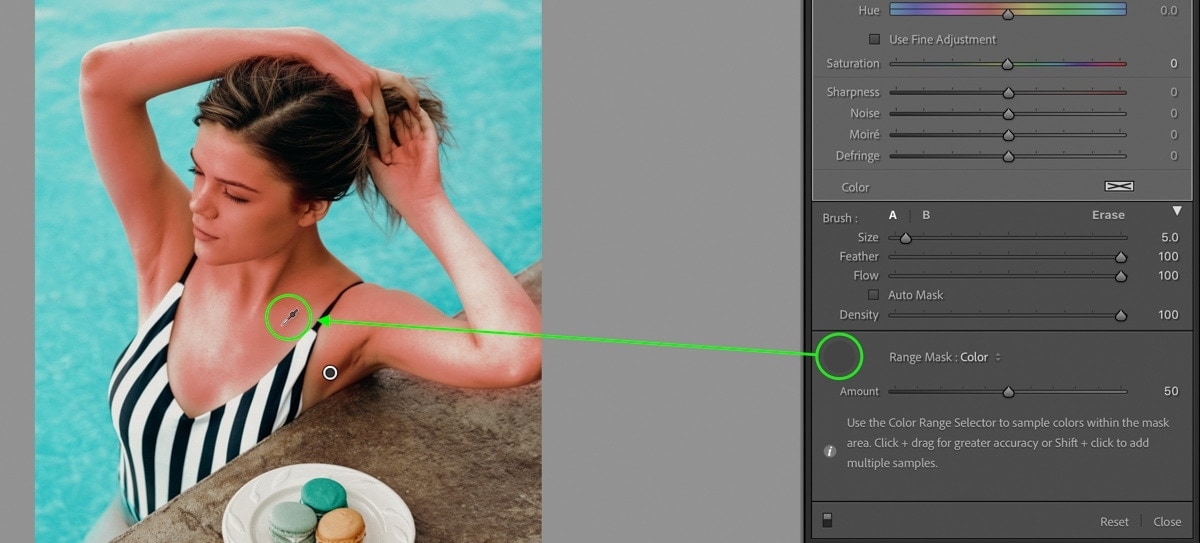
Since there are probable multiple tones to include, agree the Shift Key and click between different skin colors in your photo. This will create multiple color samples to help ameliorate your mask. Now you've quickly selected the highlights, mid-tones, and shadows on your skin to adapt.
To double-check your mask, press O on your keyboard to toggle the mask'southward visibility.
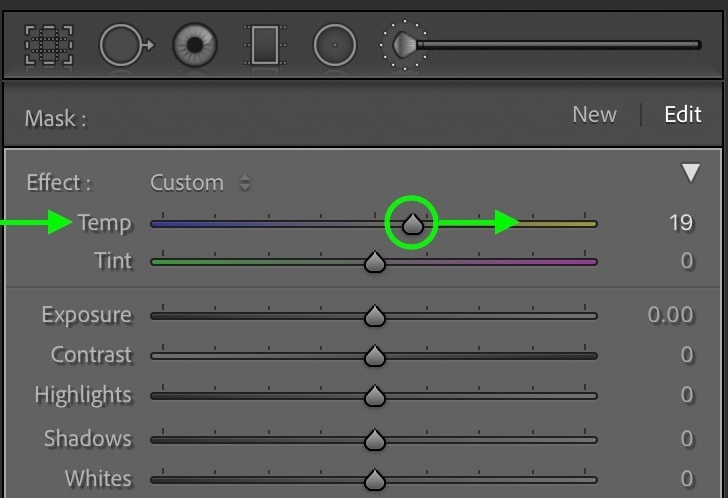
Step 3: Warm Up The White Balance
With your pick consummate, allow's start tanning. Get-go by increasing the white balance adjustment to favor a more yellow hue. This is easily done by moving the Temp slider to the right.
Since y'all're working with a mask in this example, your adjustment will only be practical to the selected area. Everything outside your mask volition remain untouched.
Ah, the beauty of selective adjustments!
Step four: Change The Selective Hue Adjustment
Clicking on the Hue adjustment, this will add together a full general hue adjustment to the entire selection. By adding a bit of orangey-cherry to the peel, you'll in plow make yourself look more tan.
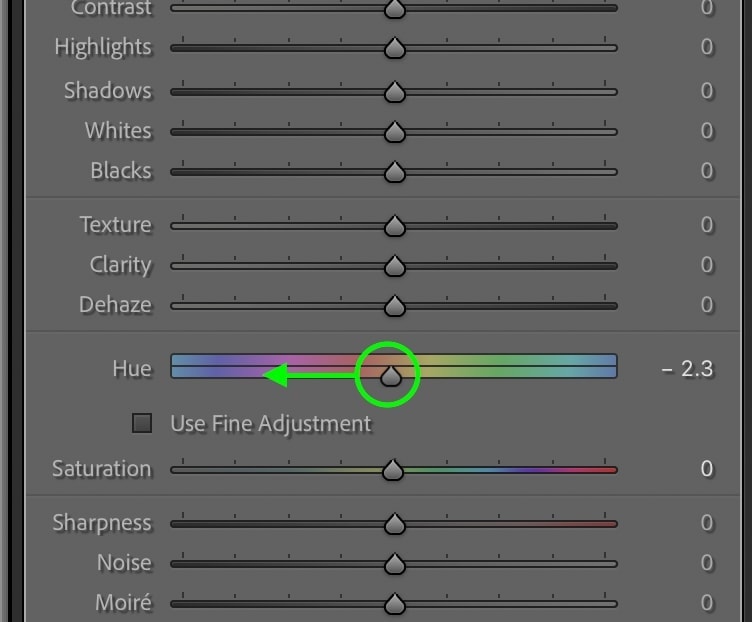
By moving this slider to the left, you lot can chop-chop brand this hue aligning. Depending on your photograph and your subject area's pare tones, the exact hue settings to employ will vary. Play around with this adjustment until you're happy with the result.
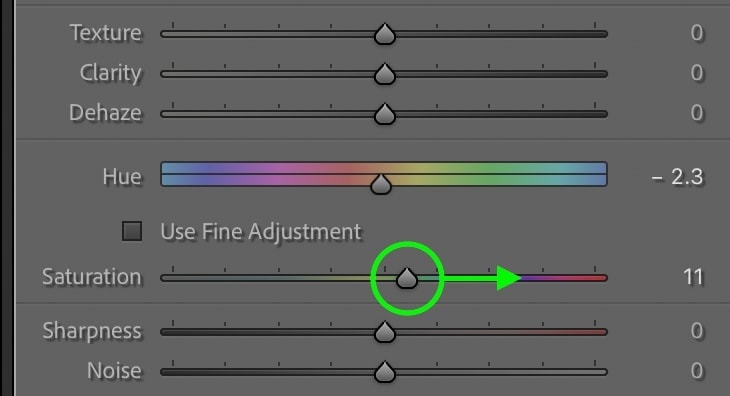
Footstep v: Heave The Saturation Slider
Lastly, increase the saturation slider to help brand the tan consequence more noticeable.
Now y'all're left with more tan skin, this time with selective adjustments!
The Result
So those are two different ways to make your skin look tan in Lightroom. With the assistance of the HSL sliders, this effect can be done very quickly and actually help to raise skin tones. The only problem, still, is that the HSL aligning affects the unabridged epitome. If y'all accept whatever similar hues in the background as you do your skin, it doesn't create the virtually desirable effect.
Luckily, you can piece of work around this with the help of an adjustment brush and a color range mask. The adjustment castor applies a selective aligning, while the range mask allows you to refine the mask to merely bear witness over your skin. That way when information technology comes fourth dimension to create a tan, y'all tin can go wild without the worry of your groundwork changing colors too.
The one you choose to employ will all depend on the photo you're working with. I love using the second method since I can exist extremely precise with the adjustments. If y'all aren't sure which to utilise, experiment with both and see which yous like all-time.
If you're ready to learn how to stylize your photo even further, check out this tutorial on editing brown earthy tones in Lightroom!
Happy editing,
Brendan 🙂
Source: https://www.bwillcreative.com/how-to-make-yourself-look-tan-in-lightroom/
Posted by: baronmoreary.blogspot.com
0 Response to "How To Make Someone Look Tan In Photoshop"
Post a Comment